


Before you start
Three things must already be set up. If anything is missing, the post will be created but it will have nowhere to go.
- Marketplace credentials — connect AliExpress (or Amazon) under Settings so Afflow can fetch product data and generate trackable affiliate links.
- At least one category — categories control the post's language, currency, tone, AI settings, schedule, and which groups it can reach.
- At least one group — connect a Telegram channel, WhatsApp group, Facebook page, or Pinterest board under Groups and assign it to your category.
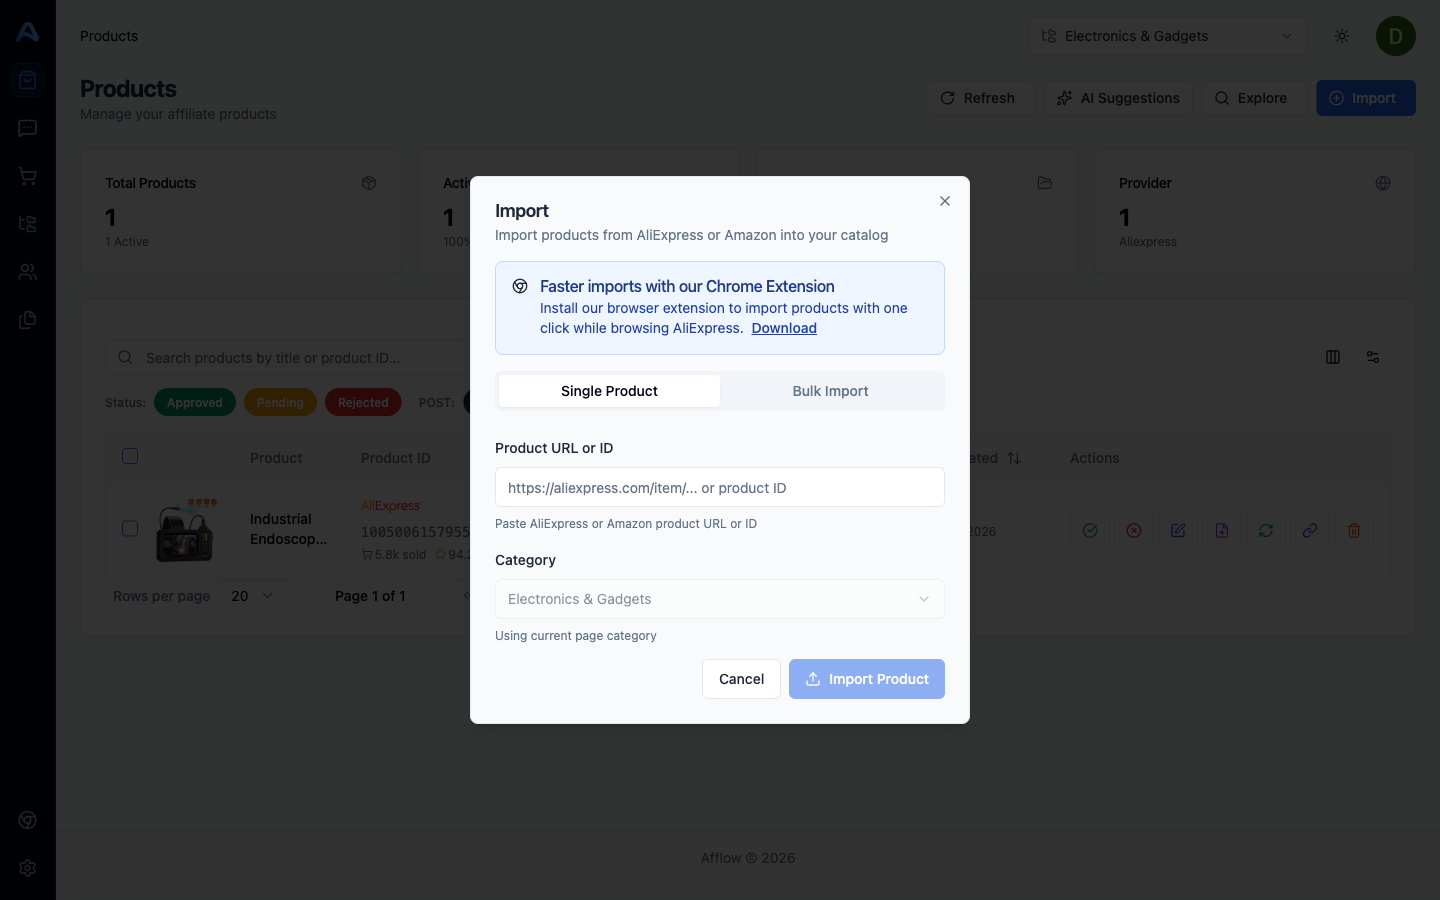
Step 1 — Import a product
Open Products → New, paste an AliExpress or Amazon URL, choose the category, and import. Afflow fetches the title, images, price, discount, and reviews. The product now sits in your catalog — but no post exists yet.
Step 2 — Create the post from the product
Back in Products, find the product you just imported and click Create Post. Afflow's AI writer starts generating — wait a few seconds for it to write the title, body, hook, and any configured variants. This step uses 1 credit (plus extra for variants).

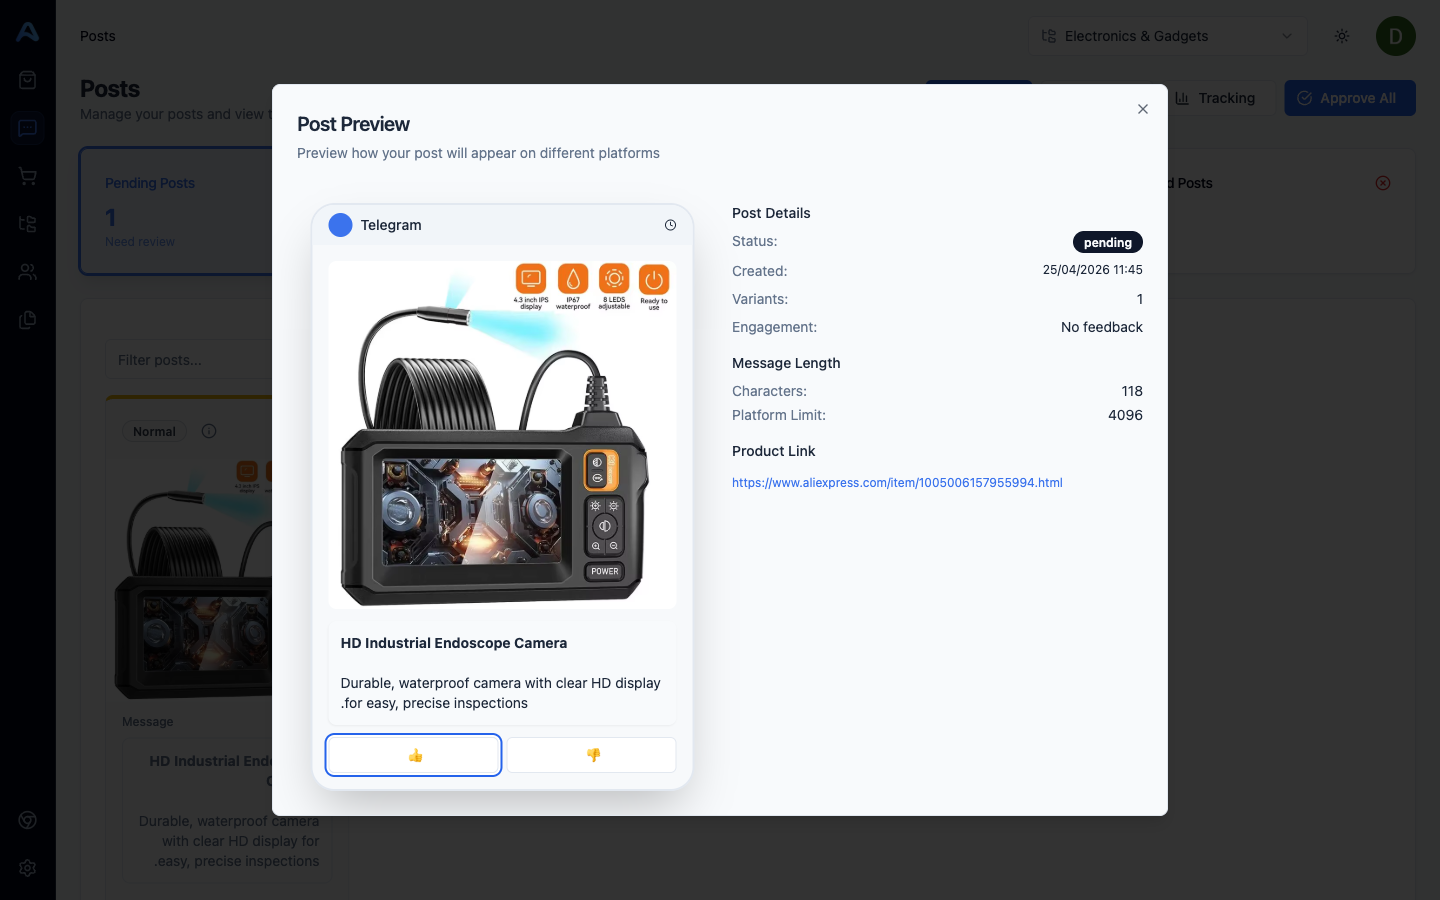
Step 3 — Review the Pending post
Open Posts. The new post is on the Pending tab. Click it to open the editor. You can rewrite the title and body, reorder or remove images, switch the variant the post will use, or reject the post outright.
Step 4 — Approve
Click Approve. The post moves to the Approved tab. At this point it is eligible to publish — but it has not been published yet. Approval and publishing are separate steps.
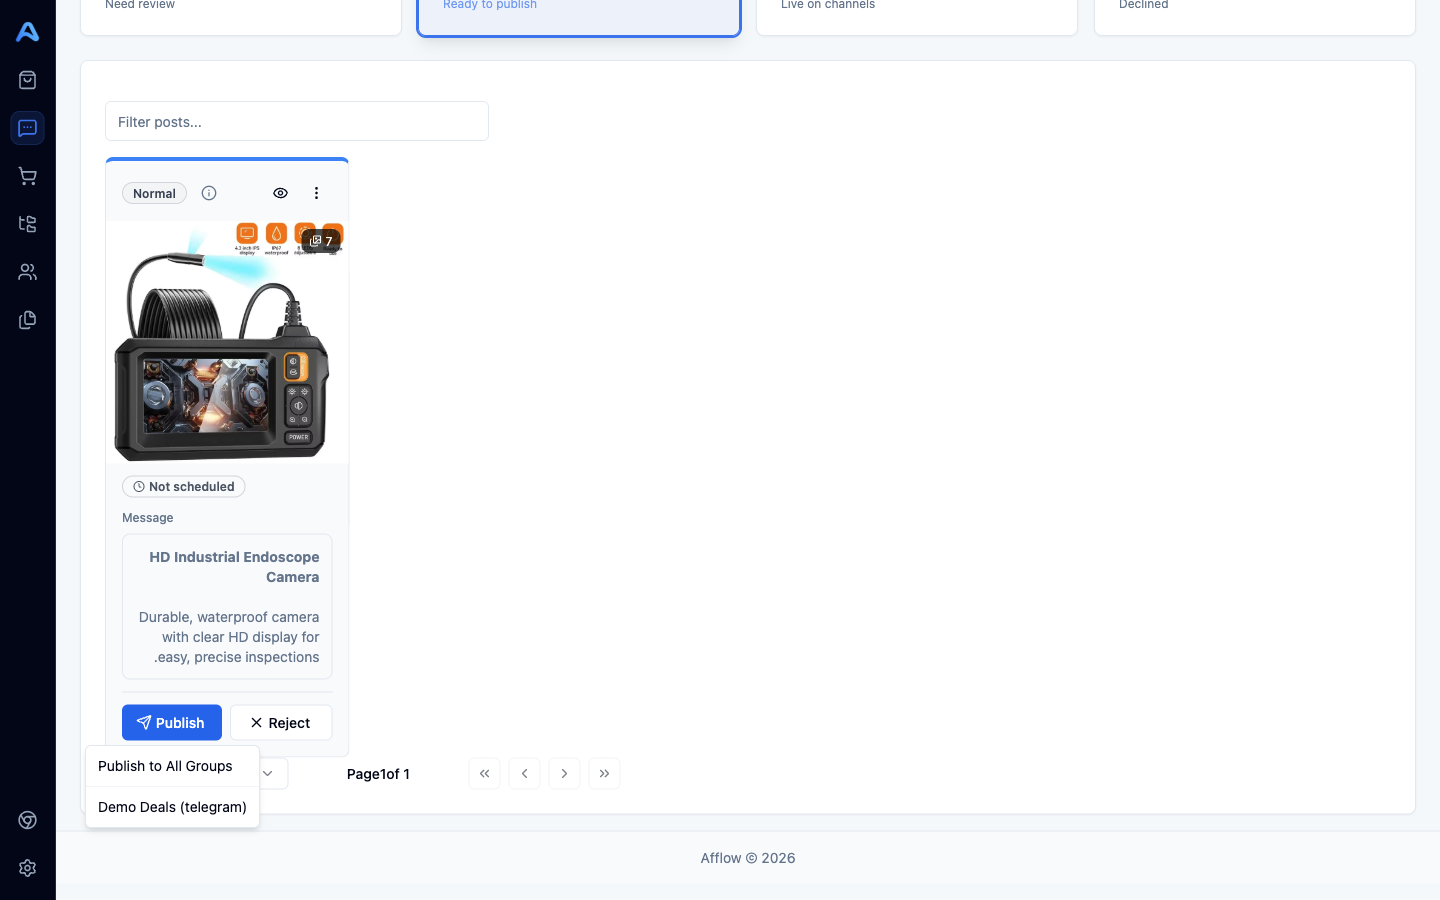
Step 5 — Publish
From the approved post you have three publishing options:
- Publish to one group — pick a single group and send the post immediately.
- Publish to All Groups — fan the post out to every group attached to its category in one click. Each group gets its own tracking link.
- Schedule — set a future time using the schedule picker (next article).
Once published, the post moves to the Published tab and the tracked link goes live. Any conversions show up in Reports → Post Tracking.